One of the first joints I learned to weld in the shop was the butt joint, and at the time I didn’t realize how important it would be in real-world fabrication. Whether you’re running MIG on mild steel, TIG on stainless, or even stick welding thicker plate with filler rods, the butt joint shows up everywhere — from pipe welding to sheet metal work. The challenge most beginners face is figuring out why and when to use a butt joint, especially when dealing with different metal thicknesses, edge prep, and arc control.
Done right, it gives you strong, clean welds with full penetration, but if the joint prep is sloppy or the heat input isn’t balanced, you’ll end up with weak fusion or excessive distortion. Understanding what a butt joint is used for can save time, reduce rework, and make a huge difference in safety and structural strength. Stick with me, and I’ll break down exactly why this simple joint is so essential and how to make it work for you in the shop or out in the field.
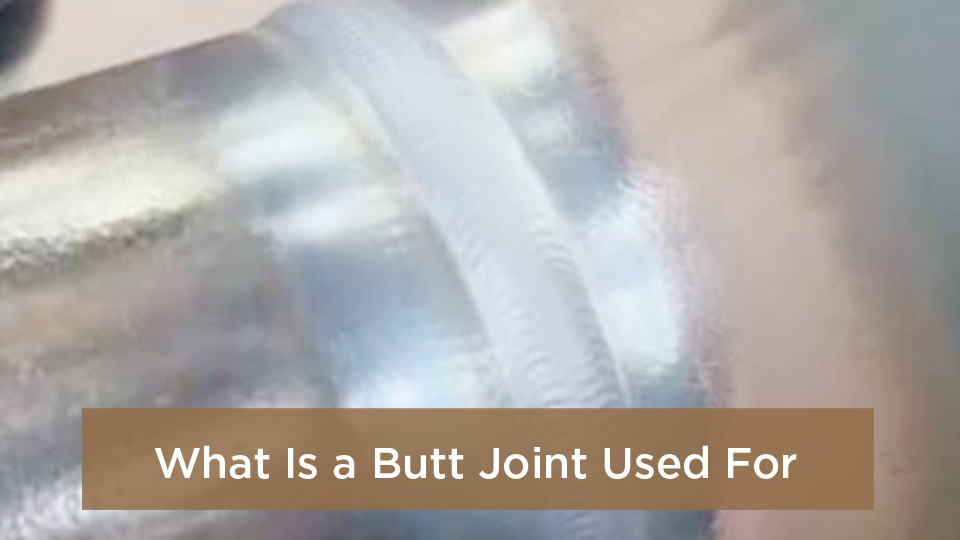
Image by yeswelder
Basics of Butt Joints in Welding
A butt joint is basically two flat edges meeting head-on, welded to become seamless. Think of it like shaking hands—direct contact, no frills. In welding terms, it’s a groove weld where the filler metal fills the gap between those edges, creating full penetration for maximum hold.
What sets it apart from a lap or tee? No overlap means less distortion risk, but it demands precise alignment. I’ve seen hobbyists jump straight in without a level, ending up with a wavy seam that looks like it was welded on a rollercoaster. The key? It’s all about the faying surfaces—those mating edges. Clean them right, and your weld’s got backbone; leave mill scale or oil, and it’s weak from the start.
In my early days fabricating trailer hitches, I learned the hard way that butt joints shine in straight-line applications. They’re not for every corner, but when you need efficiency, they’re gold. And safety-wise? Following AWS D1.1 codes keeps things legit—proper prep means no hydrogen cracks sneaking up on you later.
When and Why to Choose a Butt Joint Over Other Welds
Ever wonder why not every joint’s a fillet or lap? It boils down to your project’s demands. Use a butt joint when you’re joining plates or pipes end-to-end for structural continuity—like extending a beam or sealing a tank. It’s ideal for load-bearing spots where you want the full cross-section strength without extra weight.
Why pick it? Cost efficiency, for one. Less metal to weld means shorter run times and lower filler use. In a pro shop, that adds up fast. For DIYers building a gate from scrap I-beam, it’s forgiving on basic setups. But here’s the real talk: it’s not for high-stress bends. I’ve switched to laps there to spread the load.
Material compatibility plays huge too. Butt joints work great on carbon steels, but with aluminum? Watch for oxide layers—they’ll sabotage fusion. And safety: a solid butt means no weak points for fatigue under vibration, like in truck frames. Bottom line, if your design calls for inline strength and clean lines, butt it up.
Types of Butt Joints and Which One Fits Your Project
Butt joints aren’t one-size-fits-all; the type hinges on thickness, access, and strength needs. Let’s break ’em down—I’ve sketched these on shop napkins more times than I can count.
Square Butt Joints for Thin Materials
Start here if you’re under 1/4-inch thick. No groove prep—just square edges butted tight with a tiny root gap, maybe 1/16-inch. Run a single pass for full penetration. I use these for sheet metal patches on trailers; quick and clean with MIG at 18 volts, 150 IPM wire speed.
Pros: Minimal prep, fast. Cons: Burn-through on super thin stuff if your heat’s too hot. Tip: Tack opposite sides to pull it straight.
V-Groove Butt Joints for Medium Thickness
Hit 1/4 to 3/4-inch, and bevel those edges to a 60-degree included angle. Filler flows in like a river, building layers for deep fusion. Common in structural fab—think I-beams.
I’ve burned through a few learning curves; set your angle too shallow, and slag traps form. Fix: Use a 37.5-degree bevel per side. For AWS compliance, aim for 100% penetration.
Bevel and J-Groove for One-Sided Access
Tight spots? Single bevel on thicker stock, or J for that curved edge. Great for pipe runs where you can’t flip the work.
Anecdote: On a refinery shutdown, J-grooves saved my bacon—welded overhead without flipping 12-inch pipe. Settings: TIG at 120 amps, 15 CFH argon. Mistake to avoid: Forgetting backing bar; it leads to root concavity.
U-Groove for Heavy Duty
Over 3/4-inch? U-shape grooves concentrate heat, less filler needed. They’re my go-to for pressure vessels—smoother stress flow.
Pro tip: Parallel sides at the root cut distortion. Cons: More grinding post-weld.
| Groove Type | Material Thickness | Prep Time | Strength Level | Best For |
|---|---|---|---|---|
| Square | <1/4″ | Low | Good | Sheet metal, quick repairs |
| V-Groove | 1/4″-3/4″ | Medium | Excellent | Structural beams, frames |
| Single Bevel/J | 1/2″-1″ | Medium | Very Good | Pipes, one-sided access |
| U-Groove | >3/4″ | High | Superior | Heavy fab, vessels |
This table’s saved me hours debating setups—pick based on your Miller or Lincoln machine’s sweet spot.
Preparing Your Butt Joint: The Prep Work That Makes or Breaks It
Prep’s where pros separate from amateurs. I’ve redone welds because of lazy edges—don’t be that guy. Start with clean metal: Wire brush or grind to bright, no oils. Measure your root gap—2-3mm’s my rule for most arcs; too tight, no penetration; too wide, excess filler.
Tack welds next: Three or four, spaced even, about 1-inch long. Hammer ’em flat if they’re proud. For thicker stuff, pre-heat to 150°F on carbon steel to dodge cracks—grab a temp stick.
Edge prep tools? Angle grinder with flap disc for V’s, plasma for rough cuts. In the shop, we plasma square, then bevel. Safety first: Gloves, chipping hammer ready, and eye pro—sparks fly wild.
Common fix: If alignment shifts, use clamps or dogs. Anecdote: Once, on a windy site, clamps slipped; wedged wedges in the gap. Works every time.
Choosing the Right Welding Process for Butt Joints
Your machine dictates a lot, but match process to joint. I’ve got a soft spot for versatility—here’s the rundown.
MIG Welding Butt Joints: Fast and Forgiving
Short circuit or spray transfer? MIG’s king for shop fab. For 1/4-inch plate, 0.035 ER70S-6 wire, 75/25 shield gas at 20-22 volts, 200 IPM. Travel 10-15° push.
Why? Less spatter than stick, great for long seams. Mistake: Dipping too deep—crank voltage up. I’ve MIG’d miles of trailer frames; clean with a chipper post-run.
TIG Welding for Precision Butt Joints
TIG’s my precision pick—AC for aluminum butts, DCEN for steel. 1/16″ tungsten, 15-20 CFH argon. Amps? 100 for 1/8″ stock.
Pros: Control over heat input, pretty beads. Cons: Slower. Tip: Foot pedal for puddle size. Student story: Taught a kid TIG; he overheated first pass—dial back 10 amps, practice on scrap.
Stick Welding Butt Joints: The Old-School Reliable
SMAW with E7018 rods for outdoors. 1/8″ rod, 90-110 amps, drag technique. Great for dirty steel.
Fix for porosity: Dry rods at 250°F oven. I’ve stuck field repairs in rain—6010 for root, 7018 fill.
Other Processes: When to Go Beyond Arc
Resistance for sheets, laser for aerospace—rare in my USA shops, but know ’em. Submerged arc for heavy U-grooves; auto-feed saves back.
Pick based on code: ASME Section IX loves documented params.
Step-by-Step Guide to Welding a Perfect Butt Joint
Alright, gloves on—let’s run it. This MIG example scales to others.
- Prep the Edges: Grind square or bevel to spec. Clean with acetone. Set root gap 1/8″.
- Tack It Up: Three tacks, 180° apart. Check square with a level.
- Set Your Machine: MIG: 20V, 180 IPM, 18 CFH gas. Ground clamp secure.
- Strike and Run: Start at tack end, weave slight for V’s. Steady travel, 1/2″ puddle. Backstep if needed.
- Multi-Pass if Thick: Clean slag between, feather starts. Last pass hot for tie-in.
- Cool and Inspect: Air arc defects, grind flush. VT for cracks, UT for penetration.
Took me a summer of scrapped plates to nail multi-pass. Pro tip: Mirror for root inspection—saves X-rays.
For TIG: Same prep, but pulse if your Lincoln’s got it—reduces heat.
Common Mistakes in Butt Joint Welding and How to Fix Them
We’ve all got war stories. Incomplete fusion? Too low amps or fast travel—slow down, bump heat 10%. Porosity: Moisture in flux—bake rods, dry air.
Cracking: No pre-heat on high-carbon—hit 200°F next time. Distortion: Alternate sides, clamp firm.
Anecdote: First big job, warped a tank end—clamped and back-stepped. Lesson: Weld sequence matters.
Burn-through on thin: Shorten arc, thinner wire. Fix: Backing strip.
Visual check: Convex? Grind down. Undercut? Fill with butter pass.
Pros and Cons of Using Butt Joints in Your Welds
| Pros | Cons |
|---|---|
| High strength with full pen | Prep time for thick stock |
| Material efficient, less waste | Sensitive to misalignment |
| Clean aesthetic, easy grind | Fixturing needed for long runs |
| Versatile across processes | Higher defect risk if gapped wrong |
Weigh ’em per job—worth it for piping, skip for quick laps.
Real-World Applications of Butt Joints in Welding
From my pipeline days to hobby builds, butts everywhere. Piping: Butt seamless runs, girth welds for flanges—API 1104 codes rule.
Structural: Bridge girders, AWS D1.5 for highways. Automotive: Frame extensions, exhaust joins.
Aerospace: Thin titanium butts, NADCAP certified. Shop: Trailer tongues, I used square butts on 10-gauge.
DIY: Gate posts—simple, strong. Cost saver: One butt vs. two laps.
In energy, wind tower sections—U-grooves for girth.
These keep America building—reliable under load.
Advanced Tips for Butt Joint Success on the Job Site
Dial in variables: Travel speed 8-12 IPM, angle 10-15°. For aluminum, clean with stainless brush only.
Filler match: ER308 for 304SS butts. Safety: Fume hood, leather sleeves—lead poisoning’s no joke.
Anecdote: Site weld, wind blew shield—taped it, ran anyway. Better: Portable baffles.
For students: Practice 10 coupons daily. Pros: Log params in a notebook.
Conclusion
Prep like your paycheck depends on it (it does), match your method to the metal, and always inspect. You’re now geared to tackle inline seams that hold up under real stress, whether it’s a backyard project or a mill cert job. Grab scrap, set up, and run a bead—you’ve got this. Always back-purge with argon on stainless butts; it’ll save your root from oxidation every time. Hit the shop, spark it up, and build something solid.
FAQs
What Materials Work Best for Butt Joints?
Most anything—carbon steel’s easiest, aluminum needs oxide control, stainless for corrosion spots. Match filler to base for compatibility.
How Do I Avoid Distortion in Butt Welds?
Clamp tight, weld alternating sides, use low heat input. Pre-bend if needed—I’ve straightened many a warped plate.
What’s the Difference Between Full and Partial Penetration Butt Joints?
Full goes root-to-face for max strength; partial’s surface-only, fine for non-structural. Codes dictate full for critical apps.
Can Beginners Weld Butt Joints?
Absolutely—start square on thin stock with MIG. Practice alignment; it’ll click fast.
How Thick Can You Go with a Butt Joint?
Up to several inches with U-grooves and multi-pass. Beyond? Consider electroslag, but that’s shop-big.